There has been a lot of interest in the posting about carrying bikes on the back of my Mundo, so I've decided to put up some more details and a "how to" on the process.
The original inspiration for trying this out was that the
Fort Collins Bike Library needed to move about 65 bikes from their storage location to the downtown library kiosk.
New Belgium Brewery was hosting a meeting of folks from around the country to plan this summers'
Tour de Fat festivities, and all the visitors needed bikes. The plan was to ride the bikes from storage to the library, and then walk back to the storage to pick up another bike. Repeat until done. I volunteered to help move the bikes, but not being a fan of walking I figured there had to be a better method, and thus the
Mundo Multiple Bike Loading System was born.
 |
| Carrying 2 bikes at a time. |
The basic idea was pretty easy: get a couple of v-shaped bike trays, such as those made by
Thule/
Yakima/
Rocky Mounts, mount them to the Mundo's outriggers, and start moving bikes! Sounds easy, and as it turned out, it really was. A few technical details needed to be worked out, as I will show you, but it didn't take long to figure out.
Here are the things you'll need:
(2) full length bike trays
(4) 1" hex-head stainless steel machine screws with the same diameter and thread pitch as the ones that come mounted in the Mundo's outriggers. (The stock screws might not be long enough to go through the bike tray into the fitting).
A drill
A measuring tape (to measure exactly where to drill the holes in the trays).
Some old carpet or other material to protect the frames where they contact the Mundo in transit.
(2)
Yuba 3 meter Cargo Straps (or similar).
(1) hour of time to do the first installation. (Note: once everything is measured and drilled, the process of removing or installing the racks takes less than 5 minutes).
 |
| Here's what the final installation looked like. The trays are different styles only because they were the only 2 available at the time. |
|
The most expensive part of this project were the 4 stainless steel machine screws, as the used bike trays were donated by the
Fort Collins Bike Co-op. Getting a tray or 2 for a project like this could be a bit of a stumbling block, but if you keep your eyes open you can probably find one on craigslist, your local community bike shop, or even at a metal recycling center.
Although the original inspiration for the project was a short-term job, my long-term objective was to have a way to easily carry one or more bikes with the Mundo. I have tried towing bikes, and it is not an ideal way to transport more than one bike, or even one bike over longer distances. This setup with the trays allows me to, for instance, carry my mountain bike to the trailhead (about 10 miles) using the Mundo instead of a car. It's a great way to get to and from the trails without having to ride my mountain bike on the street for a fairly long distance. The Mundo's electric assist makes it super-easy to get up to the foothills quickly where I can then enjoy the amazing Colorado singletrack.
 |
| carrying the mountain bike to the mountains. |
|
Here are some more detailed pictures of the installation process for the trays, and for those of you who might need to transport 3 bikes, I think there is a way of mounting a 3rd, short tray on the top of the cargo rack. You'd have to have the kind where you remove the front wheel, otherwise the bike would stick out too far and you might have a problem with too much weight hanging off the back of the rack.
 |
| The outrigger with one screw removed in the front and rear to allow the rack to be installed. |
 |
| Detail showing the extra-long machine screw needed due to the extra thickness of the rack. |
 |
| Lining up the hole drilled in the rack with the outriggers' screw hole. Note the slot in my wood deck for the Go-Getter bags' strap to go through. |
 |
| Here is the tray on the other side showing the holes drilled to match up with the existing screw holes in the outrigger. |
 |
| A view from the top, the rear screw is in, the front has not been attached yet. Also note the piece of old carpet around the top rack to protect the bike being carried from rubbing against the steel of the Mundo. |
|
 |
| As long as the tray is mounted at the correct angle you should have plenty of room to pedal. The exact placement of the tray, and where to drill the holes was the most critical measurement during the installation. |
 |
| Here's the mountain bike mounted on the Mundo for transport to the trailhead. |
 |
| Here's a closeup of how to strap the upper part of the bike to the rack of the Mundo. |
 |
| Another view of the strap holding the bike up. |
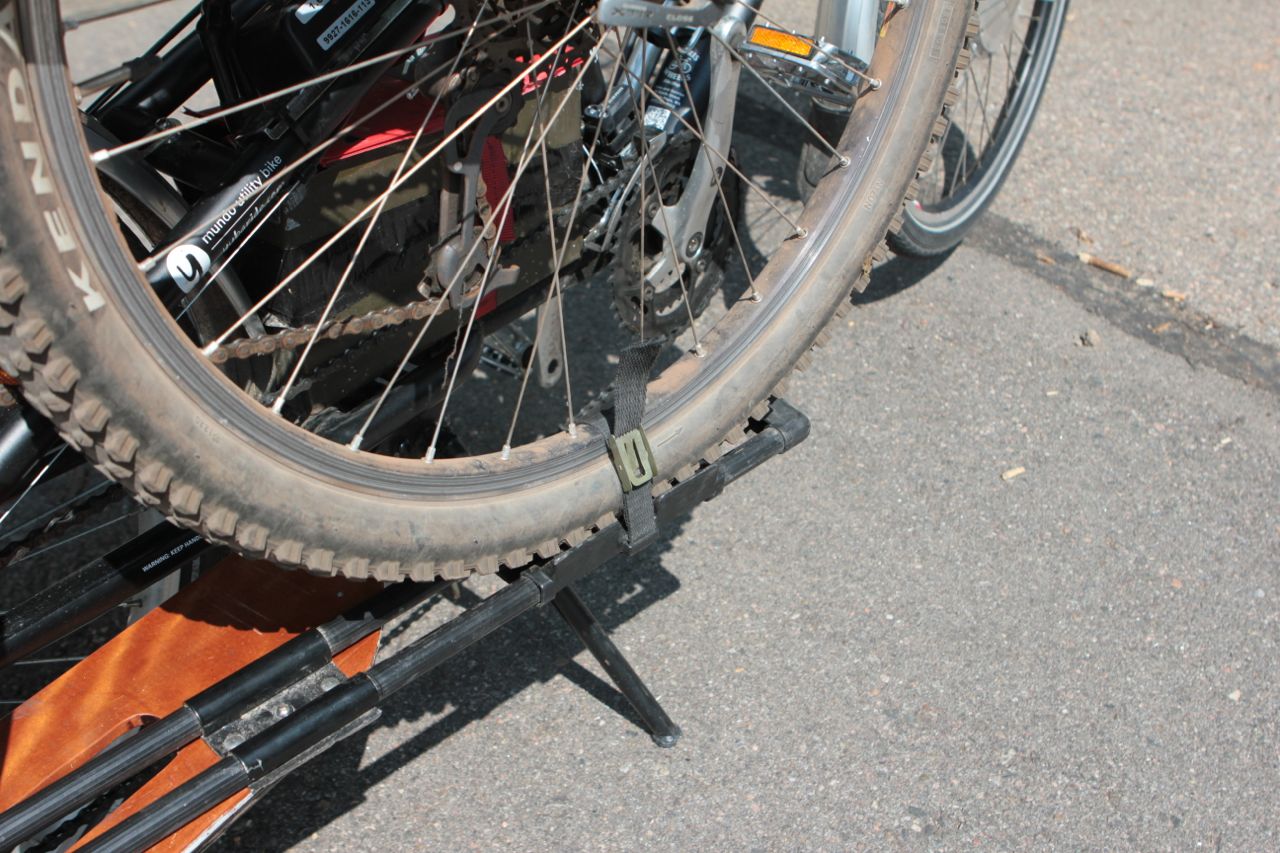 |
| Using the wheel straps that come with the bike tray to hold the wheels in place. |
 |
| And hey, I'm off to the mountains! |
Thanks for taking a look, and feel free to contact me if you have any questions about carrying bikes on your Mundo. Once the system is in place it's easy to put on or take off as needed, and as you might expect, it gets a lot of comments as you ride through town. And if you want to see a short video of the bike carrying a bike, go to my
vine page. If you need to carry even more bikes, you could always build a custom trailer such as this one I recently saw at the Bike Library, built to carry 5 bikes!
 |
| Seen at the Fort Collins Bike Library - a great design for carrying 5 bikes using any bike equipped for towing a trailer. |
